
We hear about this issue every single week from our Arvada customers. A toilet keeps running in the guest bathroom, causing the water bill to skyrocket. This annoying trickle is a common frustration for homeowners dealing with aging plumbing fixtures.
Our team knows that figuring out how to fix a running toilet is actually one of the cheapest plumbing wins available.
Here is the exact troubleshooting order to follow. You will learn what parts to replace and exactly when to call for professional toilet repair help.
Fixing this fast keeps cash in your pocket.
Why a running toilet matters
We often see homeowners ignore a running toilet for weeks. A constant flow of water might not seem urgent, but the Environmental Protection Agency (EPA) notes that a leaky toilet can waste 200 gallons of water per day. This adds up to massive waste quickly.
Our local water rates in Arvada have increased significantly leading into 2026. A single faulty flapper can easily add forty to sixty dollars to your monthly utility statement.
Here are the immediate benefits of fixing the problem today:
- Lower utility bills: Stop paying for water that goes straight down the drain.
- Prevent water damage: Constant running can sometimes lead to tank condensation and floor damage.
- Extend fixture life: A constantly working fill valve wears out much faster.
Our plumbers recommend taking action immediately to protect your property. Addressing this leak early is your best defense against high bills.
What you need before you start
Our plumbers recommend grabbing a flashlight, pliers, a sponge, a replacement flapper, and a fill valve kit before opening the tank. Having everything within reach prevents multiple trips to the hardware store. You do not need expensive specialty gear for this project.
Here is the basic tool kit required for a standard repair:
- A bright flashlight to see inside the dark tank
- A pair of slip-joint pliers or an adjustable wrench
- A small sponge and a dry towel for cleanup
- A replacement rubber flapper (Korky and Fluidmaster are excellent options under $10)
- A universal fill valve kit (typically $15 to $25)
We strongly suggest taking a picture of your toilet tank internals before heading to the store. This insider tip helps you match the exact flapper style. A standard two-inch seal will not fit a modern three-inch flush valve.
Step 1: Turn off the water and look inside
We always start any bathroom repair by securing the water source at the wall valve. Locate the shutoff valve, also called an angle stop, located on the wall just below the toilet tank and turn it clockwise.
Our next step is removing the heavy porcelain tank lid. Carefully set the lid aside on a folded towel, as dropping it on a tile floor will shatter it instantly. Flush the toilet to drain the majority of the water from the tank.
You will see four key components inside the tank:
- Fill valve: The tall column on the left side that refills the water.
- Float: A cup or ball mechanism that rises to signal the valve to shut off.
- Flapper: The rubber seal sitting at the bottom over the flush valve.
- Chain: The metal link connecting the flush handle to the flapper.
Our technicians find that most running toilets are fixed by addressing one of these specific parts. Understanding these components makes the entire process much easier.
Step 2: Check the flapper (most common cause)
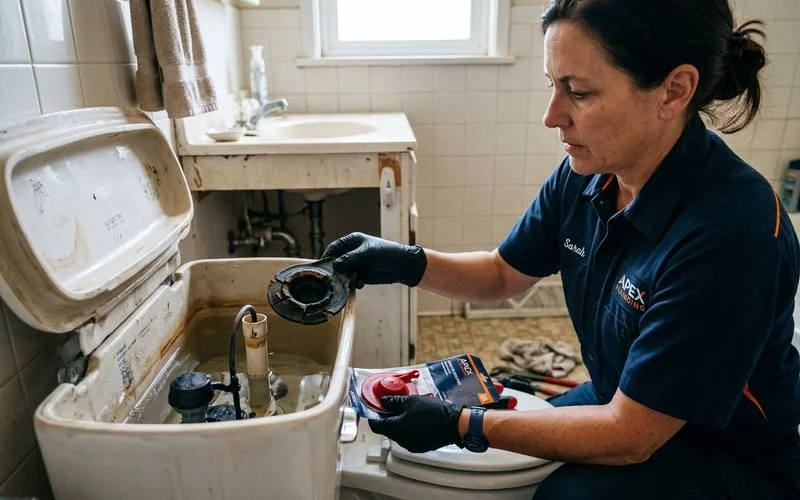
Our service calls show that inspecting and replacing a worn flapper solves 80 percent of running toilet issues. The flapper is a rubber seal that lifts during a flush and drops back down to hold water in the tank. Over time, hard water minerals degrade the rubber, causing it to warp or harden.
Our team sees this mineral damage constantly in older Arvada homes. Water then trickles past the damaged seal into the bowl continuously. The fill valve must then run constantly to keep the tank topped off.
How to test your flapper:
- Look closely at the rubber for cracks, severe discoloration, or warping.
- Press down firmly on the top of the flapper with a long screwdriver.
- Listen closely. If the running sound stops immediately, the flapper is the problem.
- Use the classic dye test. Add five drops of blue food coloring to the tank water and wait 15 minutes.
We know the flapper is leaking if blue color appears in the bowl without anyone flushing. Replacing the part is straightforward.
Replacing the flapper is a quick process. Disconnect the metal chain from the flush lever arm. Unhook the old rubber flapper from the pegs on the overflow tube, snap your new flapper into place, and reconnect the chain.
Step 3: Check the chain
We often find that adjusting the metal chain to have exactly 1/2 inch of slack fixes the leak instantly. A chain pulled too tight holds the rubber seal slightly open, letting water escape. A chain that is too loose can easily get trapped underneath the flapper as it drops.
Our technicians always check for the perfect amount of slack. The tank must be empty with the water turned off during this adjustment.
Chain Adjustment Guidelines:
- The chain should have exactly 1/2 inch of slack when the flapper rests closed.
- Hook the clip to a different chain link to shorten or lengthen the connection.
- Use pliers to snip off excess chain length if it drags heavily on the tank floor.
We see dangling chains cause problems on a weekly basis. The extra metal links inevitably slide under the seal during a flush. Snipping the extra length prevents this headache entirely.
Step 4: Check the float
We always check the float position and adjust the screw to ensure the water level sits one inch below the overflow tube. The float rises with the water level and tells the fill valve exactly when to shut down. If the float is set too high, water will constantly spill over the top of the open overflow tube.
Our plumbers look for stuck floats that prevent the valve from shutting off. Adjusting the water level is usually a matter of turning a single screw.
How to adjust the float:
- Older toilets: Bend the brass ball-and-arm float rod slightly downward to lower the water level.
- Newer toilets: Locate the adjustment screw on a Fluidmaster cup-style float. Turn it counterclockwise with a Phillips screwdriver to lower the cup.
- Target level: The water line must sit exactly one inch below the top rim of the open overflow tube.
Our plumbers recommend flushing the toilet once after adjusting the screw to verify the new resting water level. This quick check ensures your calibration is perfect.
Step 5: Replace the fill valve
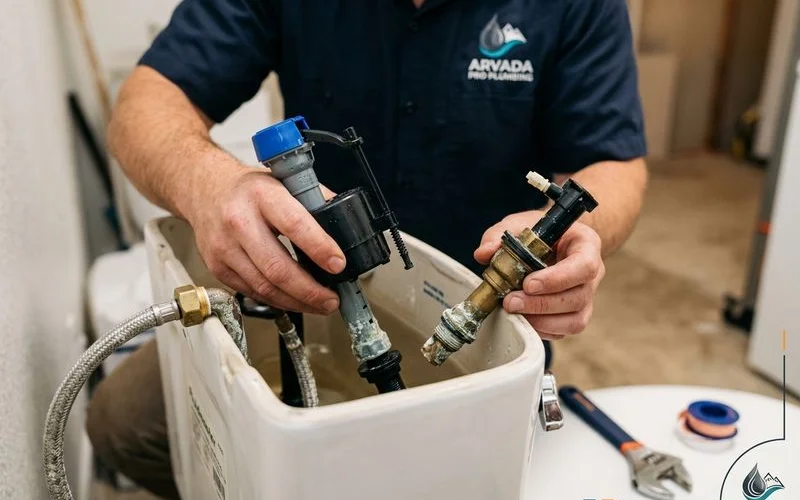
We replace the entire fill valve unit with a universal kit when basic adjustments fail to stop the constant running. If the flapper, chain, and float are functioning properly, the internal seals inside the valve are likely blown. Universal replacement kits like the Fluidmaster 400A work flawlessly on almost any standard toilet.
Our team highly recommends buying a complete kit to save time. Swapping this part takes about 20 to 30 minutes for a beginner.
Steps to replace the fill valve:
- Verify the water is off and use a sponge to dry the bottom of the tank completely.
- Place a small bucket under the tank and disconnect the braided supply line.
- Unscrew the plastic locknut holding the old fill valve in place and pull the unit out.
- Install the new valve per the manufacturer instructions and adjust the height to fit your specific tank.
- Reconnect the supply line, turn the water back on, and check for drips at the base.
Our team tightens the plastic locknut by hand to avoid cracking the fragile porcelain tank. Using a heavy wrench here is a recipe for disaster.
When to stop and call a plumber
We encourage calling a professional if you spot porcelain cracks, a leaking base, or if replacing internal parts fails to stop the water. Plumbing problems can escalate from minor annoyances to major water damage very quickly. Call for help if you feel uncomfortable at any point during the process.
Watch out for these specific warning signs:
- You replaced the flapper and the fill valve, but the toilet still runs continuously.
- The toilet rocks back and forth when you sit, indicating a failed wax ring or broken flange.
- You spot hairline cracks forming anywhere on the porcelain tank or bowl.
- The wall shutoff valve feels completely frozen or fails to stop the water flow.
- Your home features an older 1980s toilet requiring obsolete, nonstandard parts.
Our technicians can quickly diagnose issues that go beyond standard replacement parts. When repair costs start mounting, a complete replacement is often the smarter financial move. See the repair vs. replace toilet guide for help making that decision.
What a fix typically costs
We know from local data that DIY parts cost under $25, while professional repairs in Arvada average $150 to $250. Fixing a running toilet yourself is remarkably affordable, as replacement parts are cheap and widely available. Hiring a professional costs more, but guarantees the job is done correctly without leaks.
Here is a breakdown of average costs you can expect in 2026:
| Repair Option | Average Cost Range | What It Includes |
|---|---|---|
| DIY Flapper Replacement | $5 to $10 | A universal rubber seal from a local hardware store. |
| DIY Fill Valve Kit | $15 to $25 | A complete universal valve kit (like Fluidmaster). |
| Professional Repair | $150 to $250 | Labor, diagnosis, and standard replacement parts. |
| Full Toilet Replacement | $400 to $800 | A modern water-saving toilet, wax ring, and installation. |
Our pricing data shows that a running toilet remains one of the cheapest plumbing problems to resolve. Catching the leak within a few days saves your monthly water bill. You also avoid the massive headache of replacing an entire working fixture over a simple ten-dollar flapper.
If you are still unsure about how to fix a running toilet, do not hesitate to reach out. Call our Arvada plumbing team today to schedule a fast, reliable service visit.